监听器
有关 Rive 监听器的更多信息,请参阅编辑器文档。
📌 组件
Panel Renderers 负责将指针输入传递给 Rive Panels。
要求
- 如果希望 Rive Panel 接收指针事件,请将任意 Panel Renderer 上的
Pointer Input Mode设置为Enable Pointer Input。 - 向场景添加 EventSystem。它会将 Unity 的输入提供给 Panel Renderers,并使其支持 Unity 中的任何输入系统(只要该输入系统使用 EventSystem)。
- 对于 Rive Canvas Renderer,请确保父 Canvas 附加了 Graphics Raycaster。
- 对于 Rive Texture Renderer,请确保事件相机附加了 Physics Raycaster 组件。
⚠️
附加了 Rive Texture Renderer 的 GameObject 还必须附加 MeshCollider。
命中测试
命中测试控制指针事件如何与 Rive Widgets 以及其背后的内容交互。你可以使用 Rive Widget 上的 Hit Test Behavior 设置来配置此行为:
- Opaque:无论指针位置是否存在交互元素(监听器),该 widget 都会阻挡其边界内的所有指针事件。widget 背后的内容不会接收任何指针事件。
- Translucent:该 widget 只会在指针位置存在交互元素(监听器)时阻挡指针事件。如果没有命中监听器,事件会传递给 widget 背后的内容。
- Transparent:所有指针事件都会传递给 widget 背后的内容,但 Rive 监听器仍会检测并响应指针事件。这允许同时与 widget 和背景内容进行交互。
- None:该 widget 不执行任何命中测试,并忽略所有指针事件。
这种灵活性让你可以创建分层的交互体验,同时精确控制每一层如何处理指针事件。
📌 旧版 API
⚠️
此部分介绍旧版 Unity API。新项目应优先使用当前组件和 ViewModel/Data Binding 工作流。
指针位置
在 rive-unity 中,可以将指针(鼠标/触摸)事件传递给 artboard,以启用 Rive 监听器。这是通过将指针位置转换为 artboard 的局部坐标来实现的。
如需完整示例,请参阅示例仓库中的 getting-started 项目,并打开示例场景:
- DrawToCameraScene:相机上的指针事件
- DrawToCubeScene:网格上的指针事件
相机命中测试
请参阅示例仓库的 getting-started 项目中的 DrawToCameraScene 场景。

此代码片段演示了如何将相机上的鼠标位置转换为 artboard 坐标。
private Artboard m_artboard;
private StateMachine m_stateMachine;

...

Camera camera = gameObject.GetComponent<Camera>();
if (camera != null)
{
    Vector3 mousePos = camera.ScreenToViewportPoint(Input.mousePosition);
    Vector2 mouseRiveScreenPos = new Vector2(
        mousePos.x * camera.pixelWidth,
        (1 - mousePos.y) * camera.pixelHeight
    );
    if (m_artboard != null && m_lastMousePosition != mouseRiveScreenPos)
    {
        Vector2 local = m_artboard.LocalCoordinate(
            mouseRiveScreenPos,
            new Rect(0, 0, camera.pixelWidth, camera.pixelHeight),
            fit,
            alignment
        );
        m_stateMachine?.PointerMove(local);
        m_lastMousePosition = mouseRiveScreenPos;
    }
    if (Input.GetMouseButtonDown(0))
    {
        Vector2 local = m_artboard.LocalCoordinate(
            mouseRiveScreenPos,
            new Rect(0, 0, camera.pixelWidth, camera.pixelHeight),
            fit,
            alignment
        );
        m_stateMachine?.PointerDown(local);
        m_wasMouseDown = true;
    }
    else if (m_wasMouseDown)
    {
        m_wasMouseDown = false;
        Vector2 local = m_artboard.LocalCoordinate(
            mouseRiveScreenPos,
            new Rect(0, 0, camera.pixelWidth, camera.pixelHeight),
            fit,
            alignment
        );
        m_stateMachine?.PointerUp(local);
    }
}
网格命中测试
请参阅示例仓库中 getting-started 项目里的 DrawToCubeScene 场景。
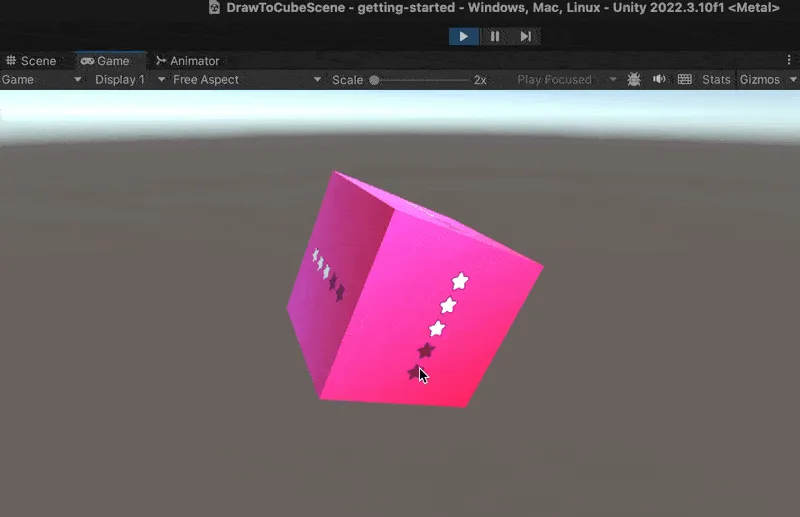
此代码片段演示了如何将对象上的 RaycastHit 转换为 artboard 的局部坐标。
GameObject 必须附加 MeshCollider。
void HitTesting()
{
    Camera camera = Camera.main;

    if (camera == null || renderTexture == null || m_artboard == null) return;

    if (!Physics.Raycast(camera.ScreenPointToRay(Input.mousePosition), out RaycastHit hit))
        return;

    Renderer rend = hit.transform.GetComponent<Renderer>();
    MeshCollider meshCollider = hit.collider as MeshCollider;

    if (rend == null || rend.sharedMaterial == null || rend.sharedMaterial.mainTexture == null || meshCollider == null)
        return;

    Vector2 pixelUV = hit.textureCoord;

    pixelUV.x *= renderTexture.width;
    pixelUV.y *= renderTexture.height;

    Vector3 mousePos = camera.ScreenToViewportPoint(Input.mousePosition);
    Vector2 mouseRiveScreenPos = new(mousePos.x * camera.pixelWidth, (1 - mousePos.y) * camera.pixelHeight);

    if (m_lastMousePosition != mouseRiveScreenPos || transform.hasChanged)
    {
        Vector2 local = m_artboard.LocalCoordinate(pixelUV, new Rect(0, 0, renderTexture.width, renderTexture.height), fit, alignment);
        m_stateMachine?.PointerMove(local);
        m_lastMousePosition = mouseRiveScreenPos;
    }
    if (Input.GetMouseButtonDown(0))
    {
        Vector2 local = m_artboard.LocalCoordinate(pixelUV, new Rect(0, 0, renderTexture.width, renderTexture.height), fit, alignment);
        m_stateMachine?.PointerDown(local);
        m_wasMouseDown = true;
    }
    else if (m_wasMouseDown)
    {
        m_wasMouseDown = false;
        Vector2 local = m_artboard.LocalCoordinate(mouseRiveScreenPos, new Rect(0, 0, renderTexture.width, renderTexture.height), fit, alignment);
        m_stateMachine?.PointerUp(local);
    }
}