列表
List 是一种显示一组项目的方式,这些项目会根据你在 View Model 中设置的绑定数据值动态生成。借助 List,你可以构建能够根据这些值的更新而实时变化的 Rive 文件。你可以使用 List 创建:
- 选项数量动态变化的菜单
- 商品列表
- 通知或活动动态
- 聊天消息
- 下拉菜单
- 联系人、好友或关注者列表
- 高分榜、表格等
Artboard List
Artboard List 允许你使用一个 Artboard 来表示 List 中的每个项目,从而生成多个列表项。Artboard List 必须作为 Artboard 或 Layout 的子级添加。
要将 Artboard List 添加到舞台,首先选择一个 Artboard 或 Layout。在编辑器右侧的检查器中,你会看到一个用于添加 Artboard List 的按钮。点击该按钮即可将 List 添加到层级结构中。它会作为你之前所选 Artboard 或 Layout 的子级出现。
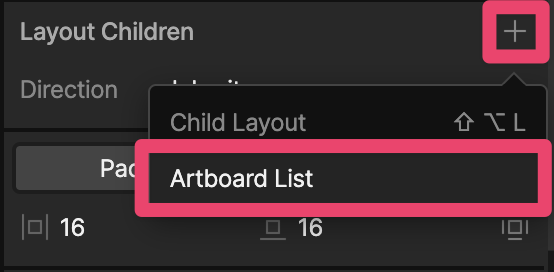
将 Artboard List 添加到层级结构后,你可以选中它并查看其检查器。
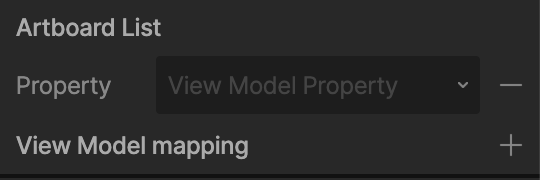
下一步是使用 Data Binding 为它绑定数据。这将决定 List 的内容以及项目数量。生成 List 内容有 2 种方式:
- 使用 View Model List 属性
- 使用 View Model Number 属性,并搭配 Number to List converter
View Model List 属性
继续之前,请务必了解 Data Binding 的基础知识,尤其是 View Model 是什么、如何创建 View Model,以及如何将它绑定到对象属性。了解更多请参阅 Data Binding 概览。
View Model List 是一种属性,可以包含动态数量的项目,其中每个项目都表示一个 View Model instance。若要在 List 中使用,View Model 必须绑定到一个 Artboard。
创建 View Model List 并将其绑定到 Artboard List:
- 创建 List Item View Model
导航到编辑器中的 Data 选项卡。点击 View Models 旁边的 + 按钮来创建一个 View Model(它将表示你的 List item)。
- 将 List Item View Model 绑定到你的 Item Artboard
将该 View Model 绑定到你想用于渲染 List item 的 Artboard。你也可以在这里创建额外的 View Model 属性,并将这些属性绑定到该 Artboard 上的对象属性。
- 创建 Main View Model
点击 View Models 旁边的 + 按钮来创建另一个 View Model(它将是包含你的 List 的 View Model,并且应绑定到你希望渲染 List 的 Artboard)。
- 添加 List 属性
选择新创建的 View Model,然后点击它旁边的 + 按钮。在弹出菜单中选择 List。这会向 View Model 添加一个 List 属性。
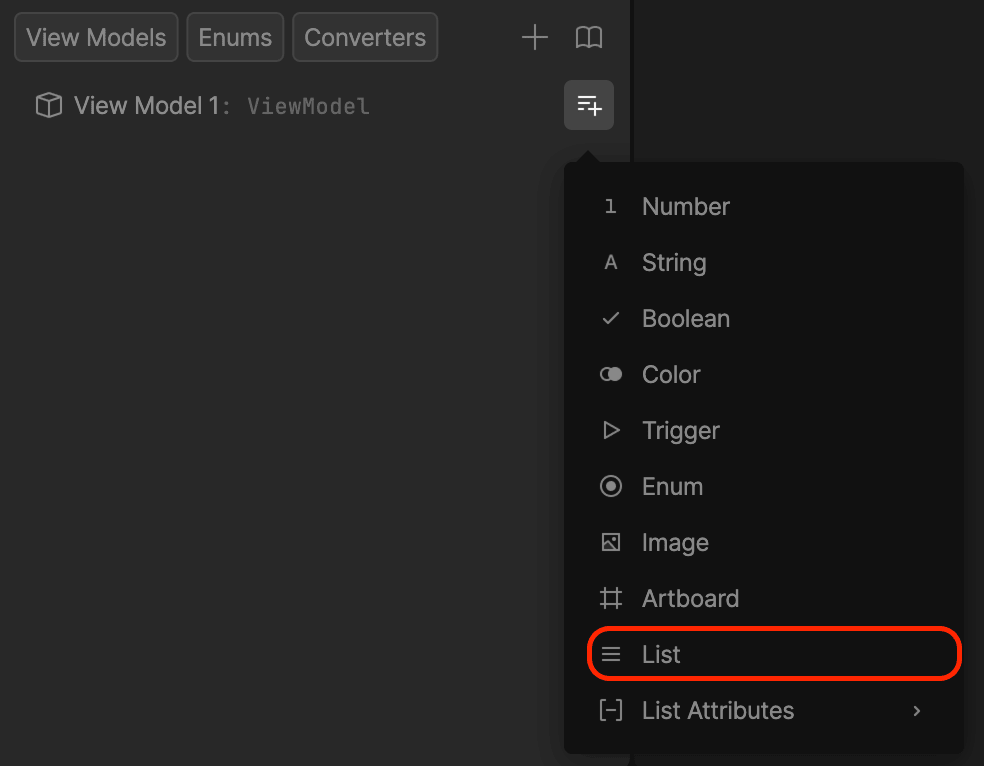
- 添加 List Items
选择 List 属性,然后在右侧检查器中,你可以通过点击 Add List item 来添加项目。
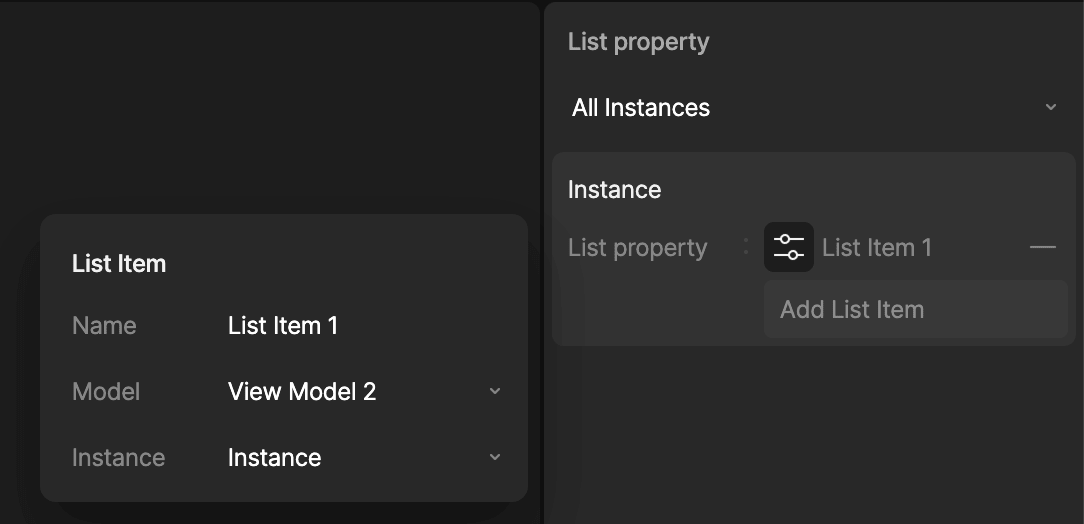 添加 List item 后,可以点击其名称左侧的设置按钮,为该项目设置 View Model 和 View Model instance。
 - 将 List 属性绑定到你的 Artboard List
添加 List items 后,返回 Hierarchy 选项卡,选择 Artboard List,然后从 Artboard List 属性下拉菜单中选择你在上面创建的 ViewModel List 属性。
运行 state machine 后,你应该会看到列表项。请记住,布局由 Artboard List 的父级决定,因此请修改父级设置来调整 List 的布局。
Rive 的 runtimes 提供了在运行时修改 List 和 List items 的 API(例如添加或移除项目)。
使用 Converter 的 View Model Number
填充 List 的第二种方式是指定你希望 List 中包含的项目数量,以及希望实例化的 ViewModel(Artboard)。这可以通过 View Model Number 属性并结合新的 Number to List converter 来完成。
创建 View Model Number to List converter 并将其绑定到 Artboard List:
- 创建 List Item View Model
导航到编辑器中的 Data 选项卡。点击 View Models 旁边的 + 按钮来创建一个 View Model(它将表示你的 List item)。
- 将 List Item View Model 绑定到你的 Item Artboard
将该 View Model 绑定到你想用于渲染 List item 的 Artboard。你也可以在这里创建额外的 View Model 属性,并将这些属性绑定到该 Artboard 上的对象属性。
- 创建 Main View Model
点击 View Models 旁边的 + 按钮来创建另一个 View Model(它将是包含你的 Number 属性的 View Model,并且应绑定到你希望渲染 List 的 Artboard)。
- 添加 Number 属性
选择新创建的 View Model,然后点击它旁边的 + 按钮。在弹出菜单中选择 Number。选择新创建的 Number,并在检查器中设置你希望 List 中包含的项目数量。
- 添加 Number to List converter
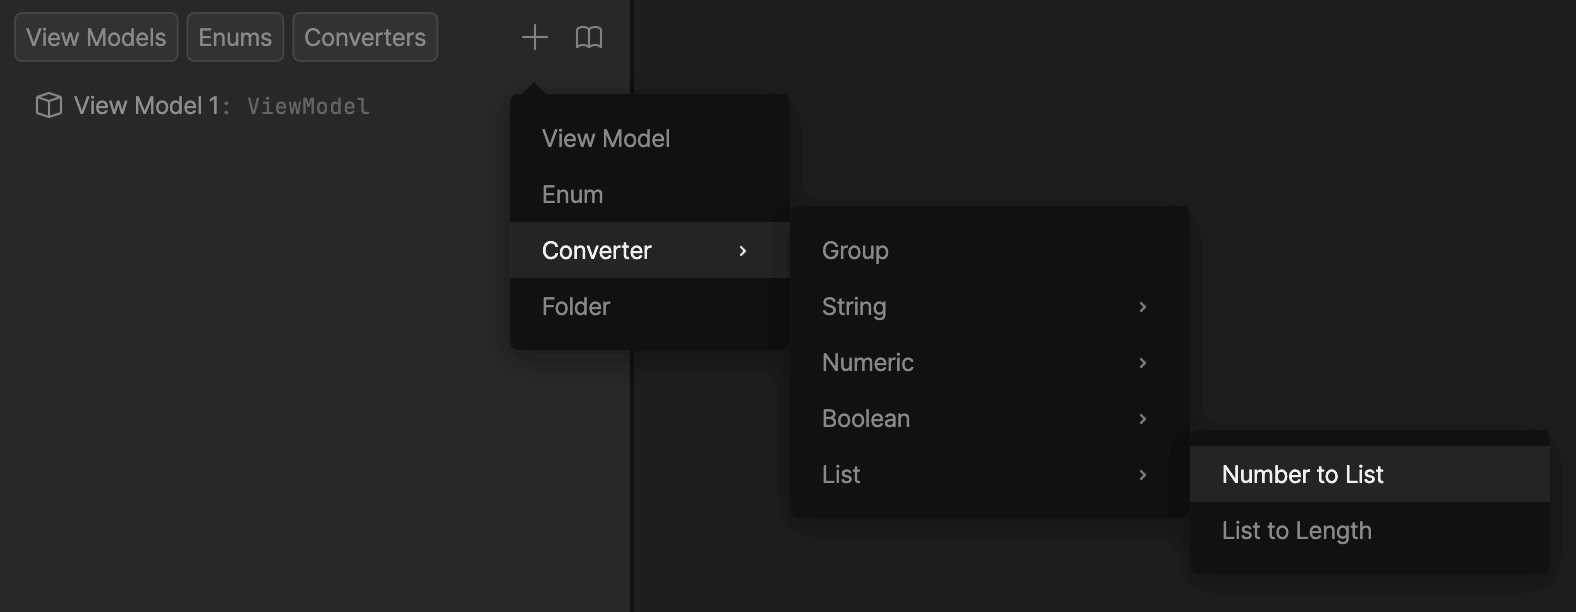
点击 + 按钮并选择 Converters > List > Number to List。
- 设置 converter 中使用的 View Model
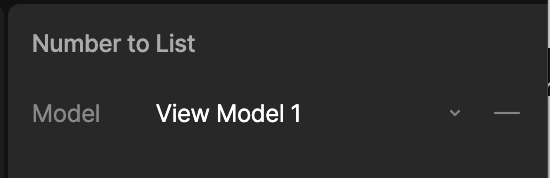
选择已创建的 converter,然后在检查器中选择你之前创建的、用于表示 List item 的 View Model。converter 会将项目数量 Number 转换为实际的 Artboard 项目。
- 将 Number 属性和 converter 绑定到你的 Artboard List
添加 Number 属性和 converter 后,返回 Hierarchy 选项卡,选择 Artboard List,然后从 Artboard List 属性下拉菜单中选择你在上面创建的 ViewModel Number 属性。Combobox 会显示黄色描边。右键点击 Combobox 并选择 Update Bind。在 converter 字段中,选择你创建的 Number to List converter。黄色描边应变为绿色。
运行 state machine 后,你应该会看到列表项。请记住,布局由 Artboard List 的父级决定,因此请修改父级设置来调整 List 的布局。
View Model list item index
有时,让 Artboard 知道自己位于父级 List 中的哪个索引位置会很有用。你可以使用 View Model list item index 属性来获取这一信息。
可以通过点击 + 按钮并选择 List Attributes > Index,将该属性添加到 item 的 View Model 中。
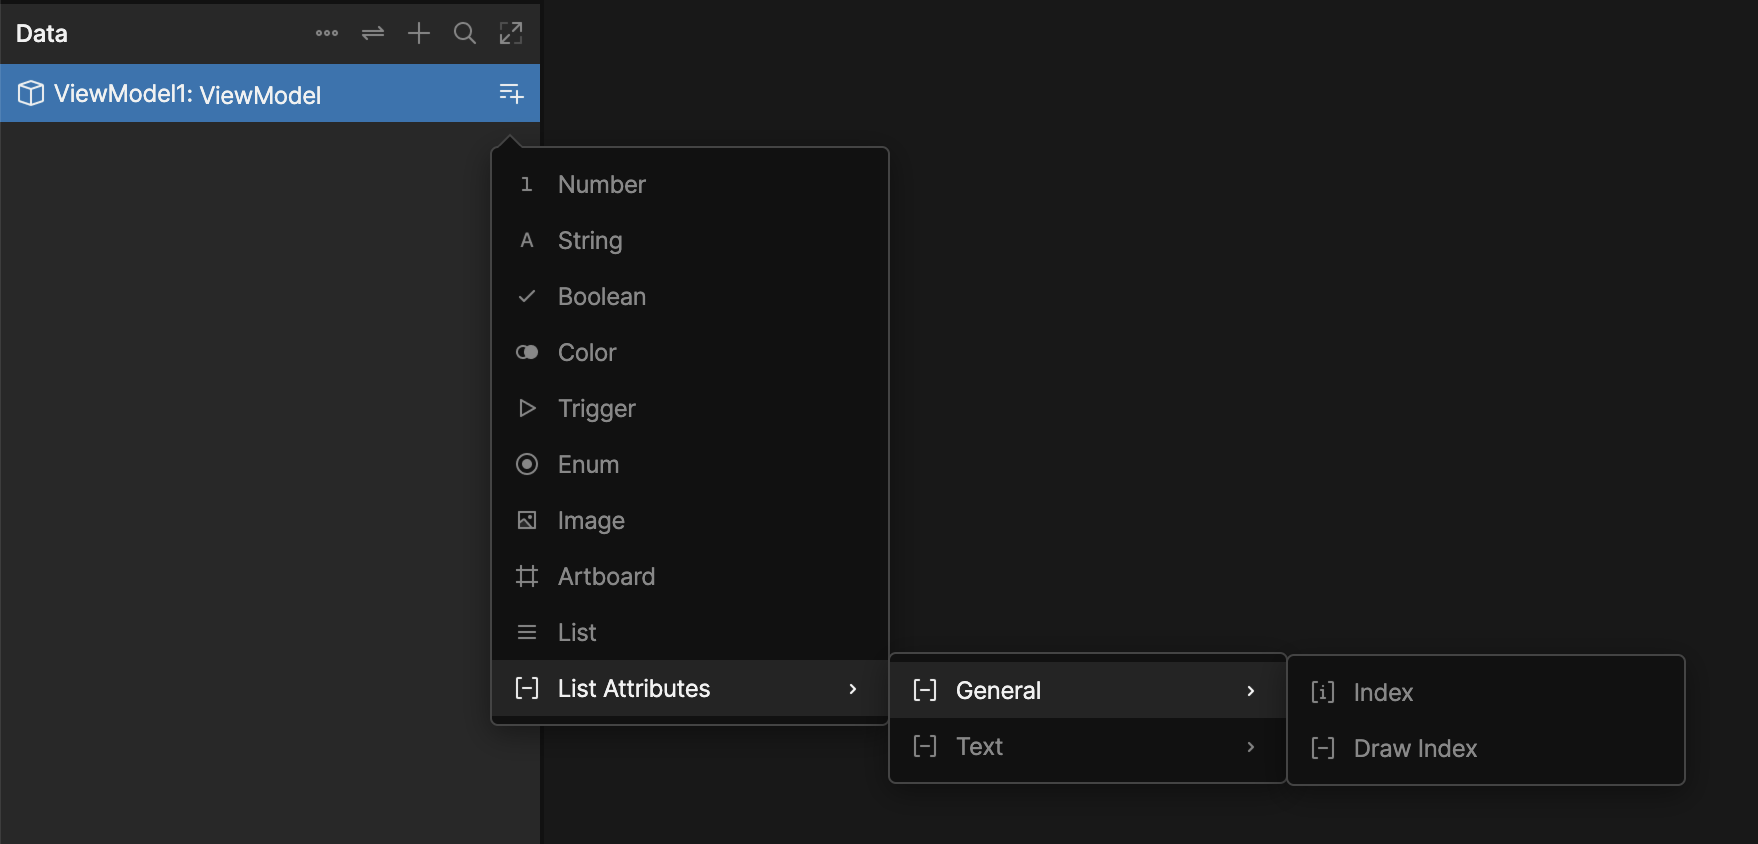
随后,可以将此属性绑定到对象属性并直接使用(例如,根据 index 改变对象的位置),也可以与 converter 一起使用(将 index 值显示为字符串),或作为 state machine 中的条件使用(根据 item 的 index 提供不同的行为)。
将 item index 与 List 属性和 list items 一起使用时,请注意:如果多个 list item 绑定到同一个 View Model instance,它们将共享相同的 index 值。
List 与滚动
如果你将 Artboard List 作为 Layout 的子级添加,那么 List items 会表现为其父级 Layout 的子级。这意味着方向、换行、内边距、间距、对齐等都由父级 Layout 的属性决定。
此外,如果你已经在父级 Layout 上应用了 Scroll Constraint,List items 将无需额外设置即可支持滚动。
滚动 List 时还可以应用一些额外的 Scroll 属性。更多详情请参阅 List Scrolling。