渲染器
rive::gpu::RenderContext 是 Rive GPU 渲染器的 API 无关前端。你可以创建一个按后端区分的 *Impl::MakeContext 工厂,将它交给渲染循环,而其余 C++ API 保持一致。
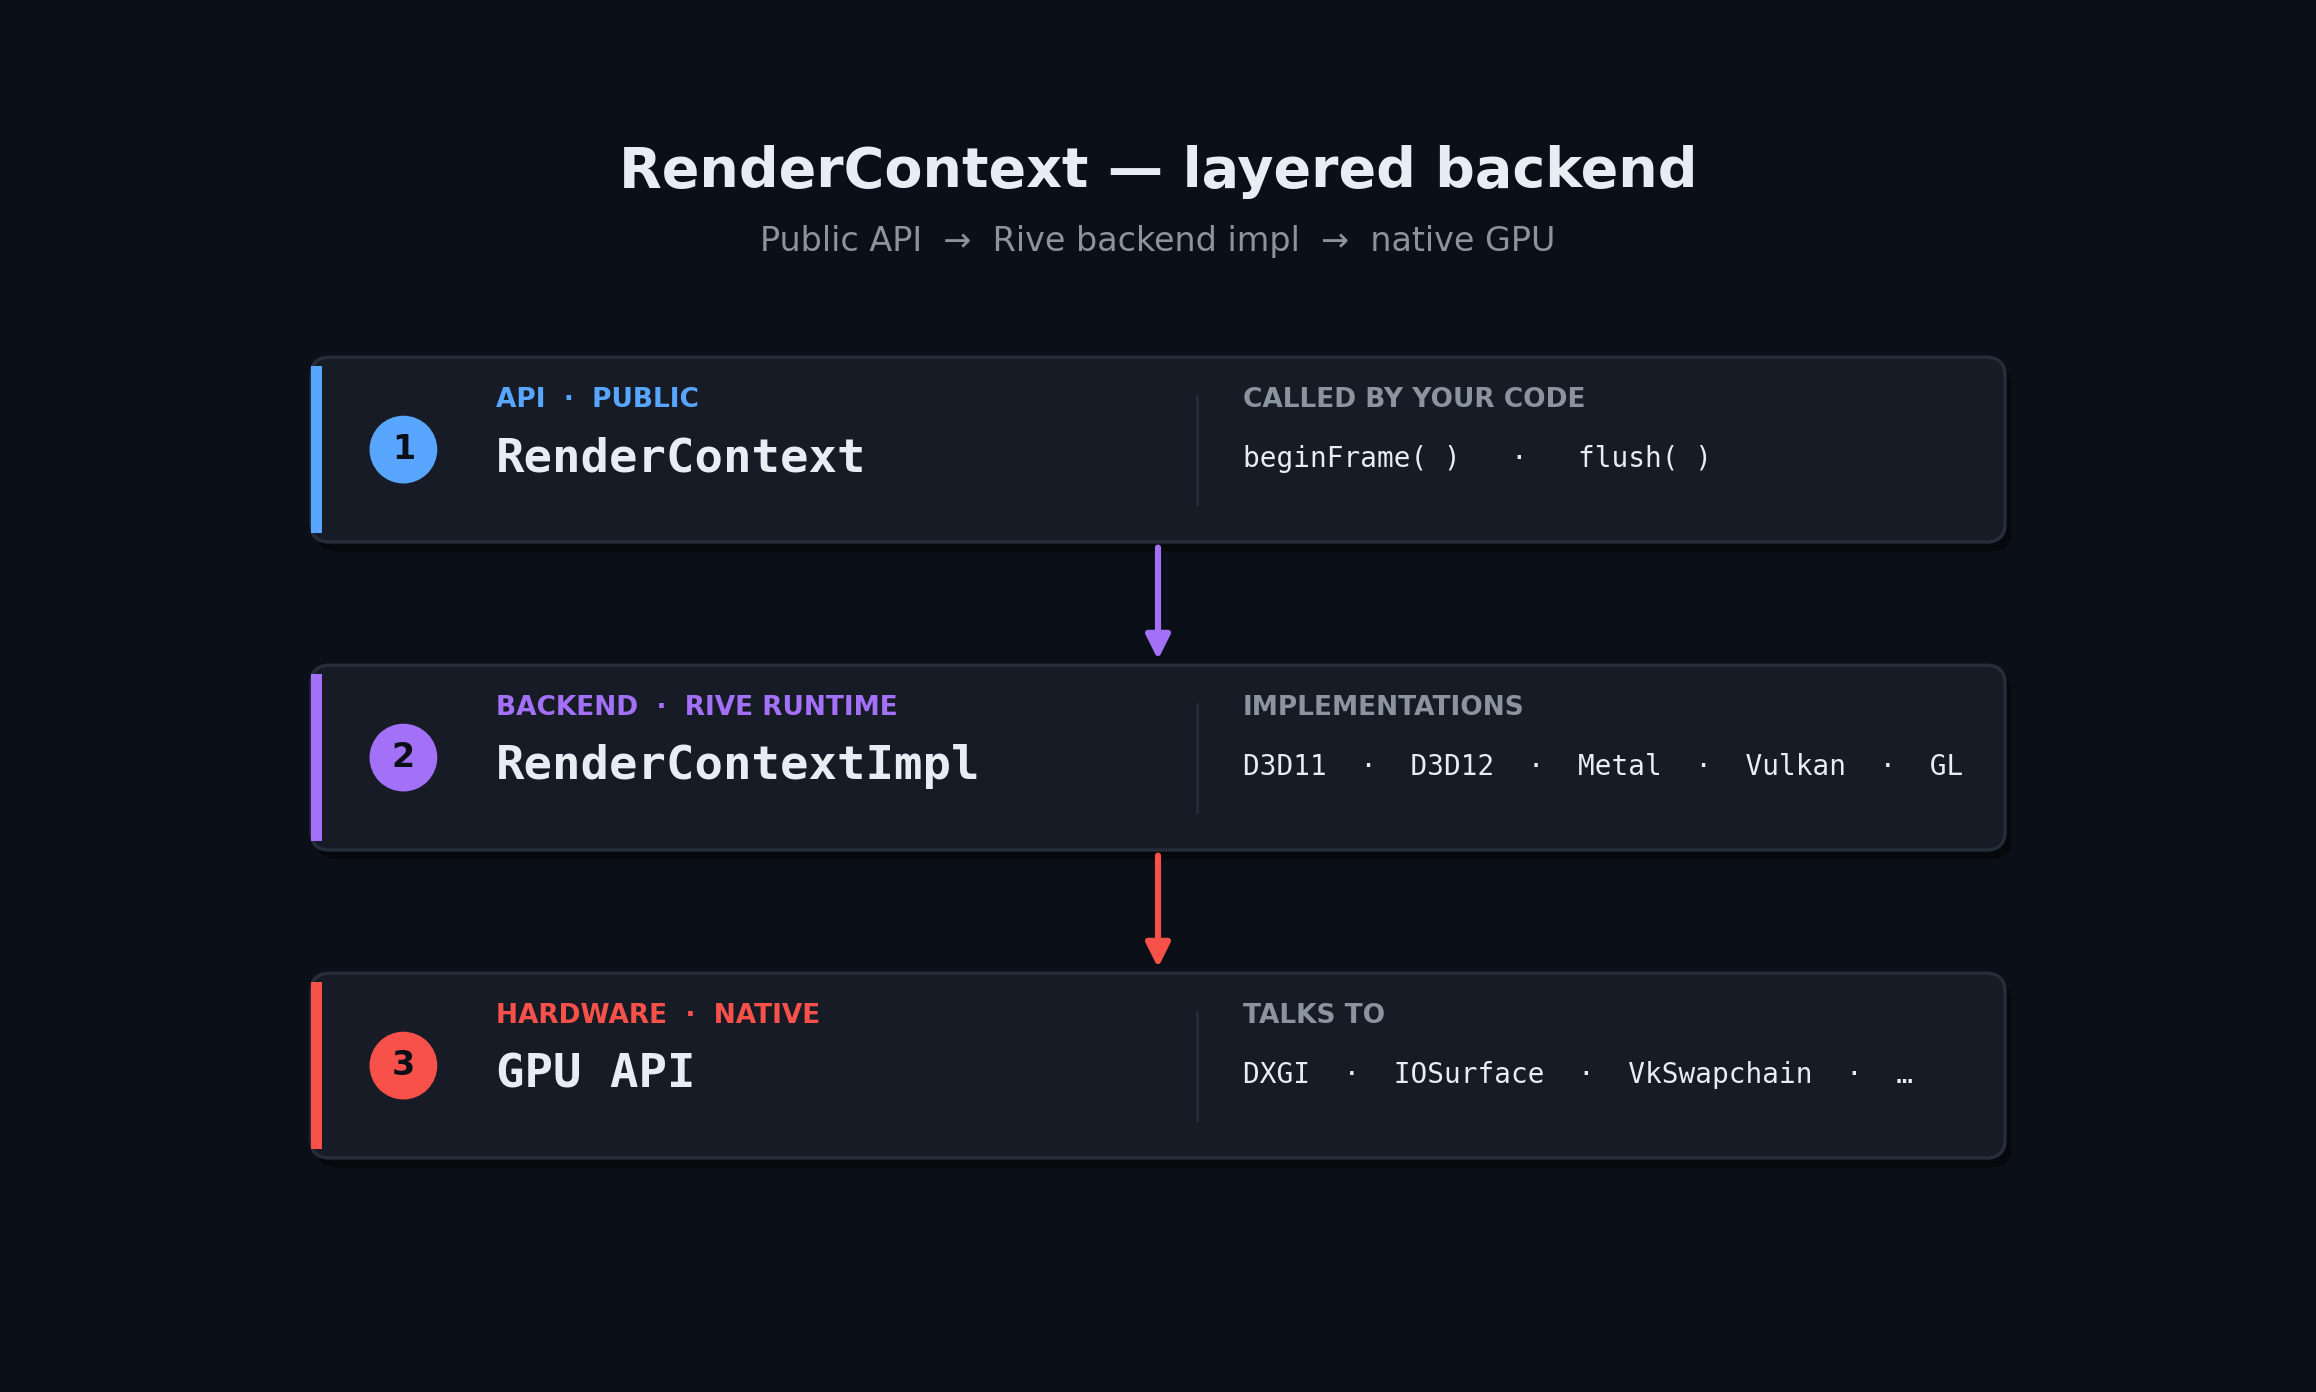
RenderContext 也实现了 rive::Factory,因此你传给 File::import 的同一个对象也会拥有你的 GPU 资源。
📌 D3D11
头文件:rive/renderer/d3d11/render_context_d3d_impl.hpp
#include "rive/renderer/d3d11/render_context_d3d_impl.hpp"

using namespace rive::gpu;

ComPtr<ID3D11Device>        device;
ComPtr<ID3D11DeviceContext> context;
// ... create device + context with D3D_FEATURE_LEVEL_11_1 ...

D3DContextOptions options;
options.isIntel = adapterDesc.VendorId == 0x163C ||
                  adapterDesc.VendorId == 0x8086 ||
                  adapterDesc.VendorId == 0x8087;

std::unique_ptr<RenderContext> rc =
    RenderContextD3DImpl::MakeContext(device, context, options);

auto* impl = rc->static_impl_cast<RenderContextD3DImpl>();
rcp<RenderTargetD3D> target = impl->makeRenderTarget(width, height);

// Each frame: bind the current backbuffer to the render target.
target->setTargetTexture(backbufferTexture);
交换链注意事项:
- 设置
BufferUsage = DXGI_USAGE_RENDER_TARGET_OUTPUT | DXGI_USAGE_UNORDERED_ACCESS。 - 使用
DXGI_FORMAT_R8G8B8A8_UNORM(或_SRGB变体);其他格式可能会迫使渲染器走离屏路径。 - 在 Intel HD Graphics 上设置
options.isIntel = true—— 这可以规避像素局部存储模拟中的一个驱动问题。
如需可运行的参考,请查看 Rive 的 tests/player 示例应用,以及 tests/common/offscreen_rendertarget_d3d.cpp 中 D3D 相关的接线代码。
📌 D3D12
头文件:rive/renderer/d3d12/render_context_d3d12_impl.hpp
#include "rive/renderer/d3d12/render_context_d3d12_impl.hpp"

using namespace rive::gpu;

ComPtr<ID3D12Device>              device;
ComPtr<ID3D12GraphicsCommandList> initList; // recording state

D3DContextOptions options;
std::unique_ptr<RenderContext> rc =
    RenderContextD3D12Impl::MakeContext(device, initList.Get(), options);

auto* impl = rc->static_impl_cast<RenderContextD3D12Impl>();
rcp<RenderTargetD3D12> target = impl->makeRenderTarget(width, height);
每一帧,将 RenderContext::FlushResources::externalCommandBuffer 填入应该记录 Rive 绘制命令的 ID3D12GraphicsCommandList,并递增 currentFrameNumber / safeFrameNumber,以便渲染器能够根据你的 fence 值安全地回收缓冲区。
传给 MakeContext 的初始化命令列表必须处于记录状态。渲染器会用它来上传静态缓冲区。请先提交它(并等待 GPU 完成),然后再发出任何帧。
📌 Metal
头文件:rive/renderer/metal/render_context_metal_impl.h
#import "rive/renderer/metal/render_context_metal_impl.h"

using namespace rive::gpu;

id<MTLDevice> device = MTLCreateSystemDefaultDevice();

RenderContextMetalImpl::ContextOptions opts;
std::unique_ptr<RenderContext> rc =
    RenderContextMetalImpl::MakeContext(device, opts);
每一帧通过 FlushResources::externalCommandBuffer 传入一个 id<MTLCommandBuffer>。Rive 不会执行 present —— 你需要自己拥有 CAMetalLayer 并调用 present。
📌 Vulkan
头文件:rive/renderer/vulkan/render_context_vulkan_impl.hpp
#include "rive/renderer/vulkan/render_context_vulkan_impl.hpp"

using namespace rive::gpu;

VulkanFeatures features;
features.independentBlend = true;        // detected from device features
// ... fill out from VkPhysicalDeviceFeatures ...

std::unique_ptr<RenderContext> rc =
    RenderContextVulkanImpl::MakeContext(
        instance,
        physicalDevice,
        device,
        features,
        vkGetInstanceProcAddr);
每一帧:
- 将
FlushResources::externalCommandBuffer设置为一个正在记录的VkCommandBuffer。 - 将
FlushResources::currentFrameNumber设置为你将要 signal 的帧索引,并将safeFrameNumber设置为你已等待其 fence 的最新帧。
Vulkan 是唯一支持 FrameDescriptor::virtualTileWidth / virtualTileHeight(帧拆分)的后端,这对于让其他工作负载在分块 GPU 上抢占 Rive 很有用。
📌 OpenGL / WebGL
头文件:rive/renderer/gl/render_context_gl_impl.hpp
#include "rive/renderer/gl/render_context_gl_impl.hpp"
#include "rive/renderer/gl/render_target_gl.hpp"

using namespace rive::gpu;

RenderContextGLImpl::ContextOptions opts;
// opts.disableFragmentShaderInterlock = true; // if your driver lies

std::unique_ptr<RenderContext> rc = RenderContextGLImpl::MakeContext(opts);
构造一个包装外部纹理或现有 FBO 的渲染目标 —— 文档图中的关系保持不变,只是绑定方式不同:
// Render into a texture you own.
rcp<TextureRenderTargetGL> target =
    make_rcp<TextureRenderTargetGL>(width, height);
target->setTargetTexture(externalTextureID);   // GLuint, you keep ownership

// Or, render into an existing FBO you own.
rcp<FramebufferRenderTargetGL> target =
    make_rcp<FramebufferRenderTargetGL>(
        width, height, fboId, sampleCount);
可以的话,优先使用 TextureRenderTargetGL —— FramebufferRenderTargetGL 通常不得不先渲染到离屏纹理再 blit 回去,因为外部 FBO 通常不可读。
Rive 会自动在以下能力层级之间选择:
- Pixel Local Storage(最佳 —— Apple GPU、现代移动设备)。
- Fragment Shader Interlock(NVIDIA、通过
GL_INTEL_…支持的 Intel)。 - R/W Texture / EXT_shader_pixel_local_storage 回退路径。
- 在真正能力最低的驱动上使用 MSAA 路径。
对于 WebGL 2:同一个头文件可以针对 Emscripten 构建 —— MakeContext 会自动选择兼容 WebGL 的 PLS 实现。
按帧选择模式
RenderContext::FrameDescriptor 携带了一些会改变渲染算法的标志:
| 字段 | 效果 |
|---|---|
loadAction | clear(默认)/ preserveRenderTarget / dontCare。 |
clearColor | ARGB;仅在 loadAction == clear 时使用。 |
msaaSampleCount | 非零值会强制使用 MSAA 模式并禁用 PLS。 |
disableRasterOrdering | 即使支持 rasterizer ordering,也强制使用 atomic 路径。 |
ditherMode | none 或 interleavedGradientNoise(默认)。 |
大多数应用保留默认值即可。只有当你在特定 GPU 上看到特定问题时,才需要覆盖这些设置。
选择后端
| 平台 | 建议 |
|---|---|
| Windows 桌面 | 如果只需要 11 级硬件,使用 D3D11;对于更新的引擎,使用 D3D12。 |
| macOS / iOS | Metal。 |
| Android | 在支持的设备上使用 Vulkan,以 GLES 作为回退。 |
| Linux 桌面 | Vulkan。 |
| Web | 通过 RenderContextGLImpl 使用 WebGL 2(使用 Emscripten 构建)。 |
| 游戏主机 | 请联系 Rive —— PS5、Xbox 和 Switch 会提供单独的运行时。 |